What’s ‘Welcome’?
The Welcome solutions from Prove are a suite of verification solutions that combine Prove’s authentication and verification engines to streamline digital interactions while combating fraud. These solutions leverage phone-centric identity technology to verify users and automate manual processes, creating a more secure and frictionless experience for both consumers and businesses.1
Step 1: Connect to Identity Graph
The Prove Identity Graph is the core engine of the Prove Platform, establishing the future of digital trust. It serves as a persistent, deterministic network that unifies tokenized identities with their associated devices, credentials, and authenticators.At the heart of the Identity Graph is the Prove ID. The Prove ID is a persistent anchor—a standardized digital key that securely binds all user’s common language identifiers, phone numbers, emails, SSN, into a single, trusted, and unified identity. This standardized anchor ensures that an identity verified in one context is recognizable across many platforms—privately and securely—without requiring repeated re-verification.Identity Resolution is the process of consistently and deterministically linking a client’s customer account ID to a Prove ID. What makes the Identity Graph powerful is its methodology. It achieves this unified view of identity using privacy-preserving techniques, such as a clean room technique.For offline batch enrollment, clients can select from three verification options that help resolve the identity:
- Assurance Level 1 - Bot Detection
- Assurance Level 2 - Verified Users
- Cross-Domain Identity Resolution
Talk to your Prove implementation manager to integrate with the Identity Graph.
2
Step 2: Authentication
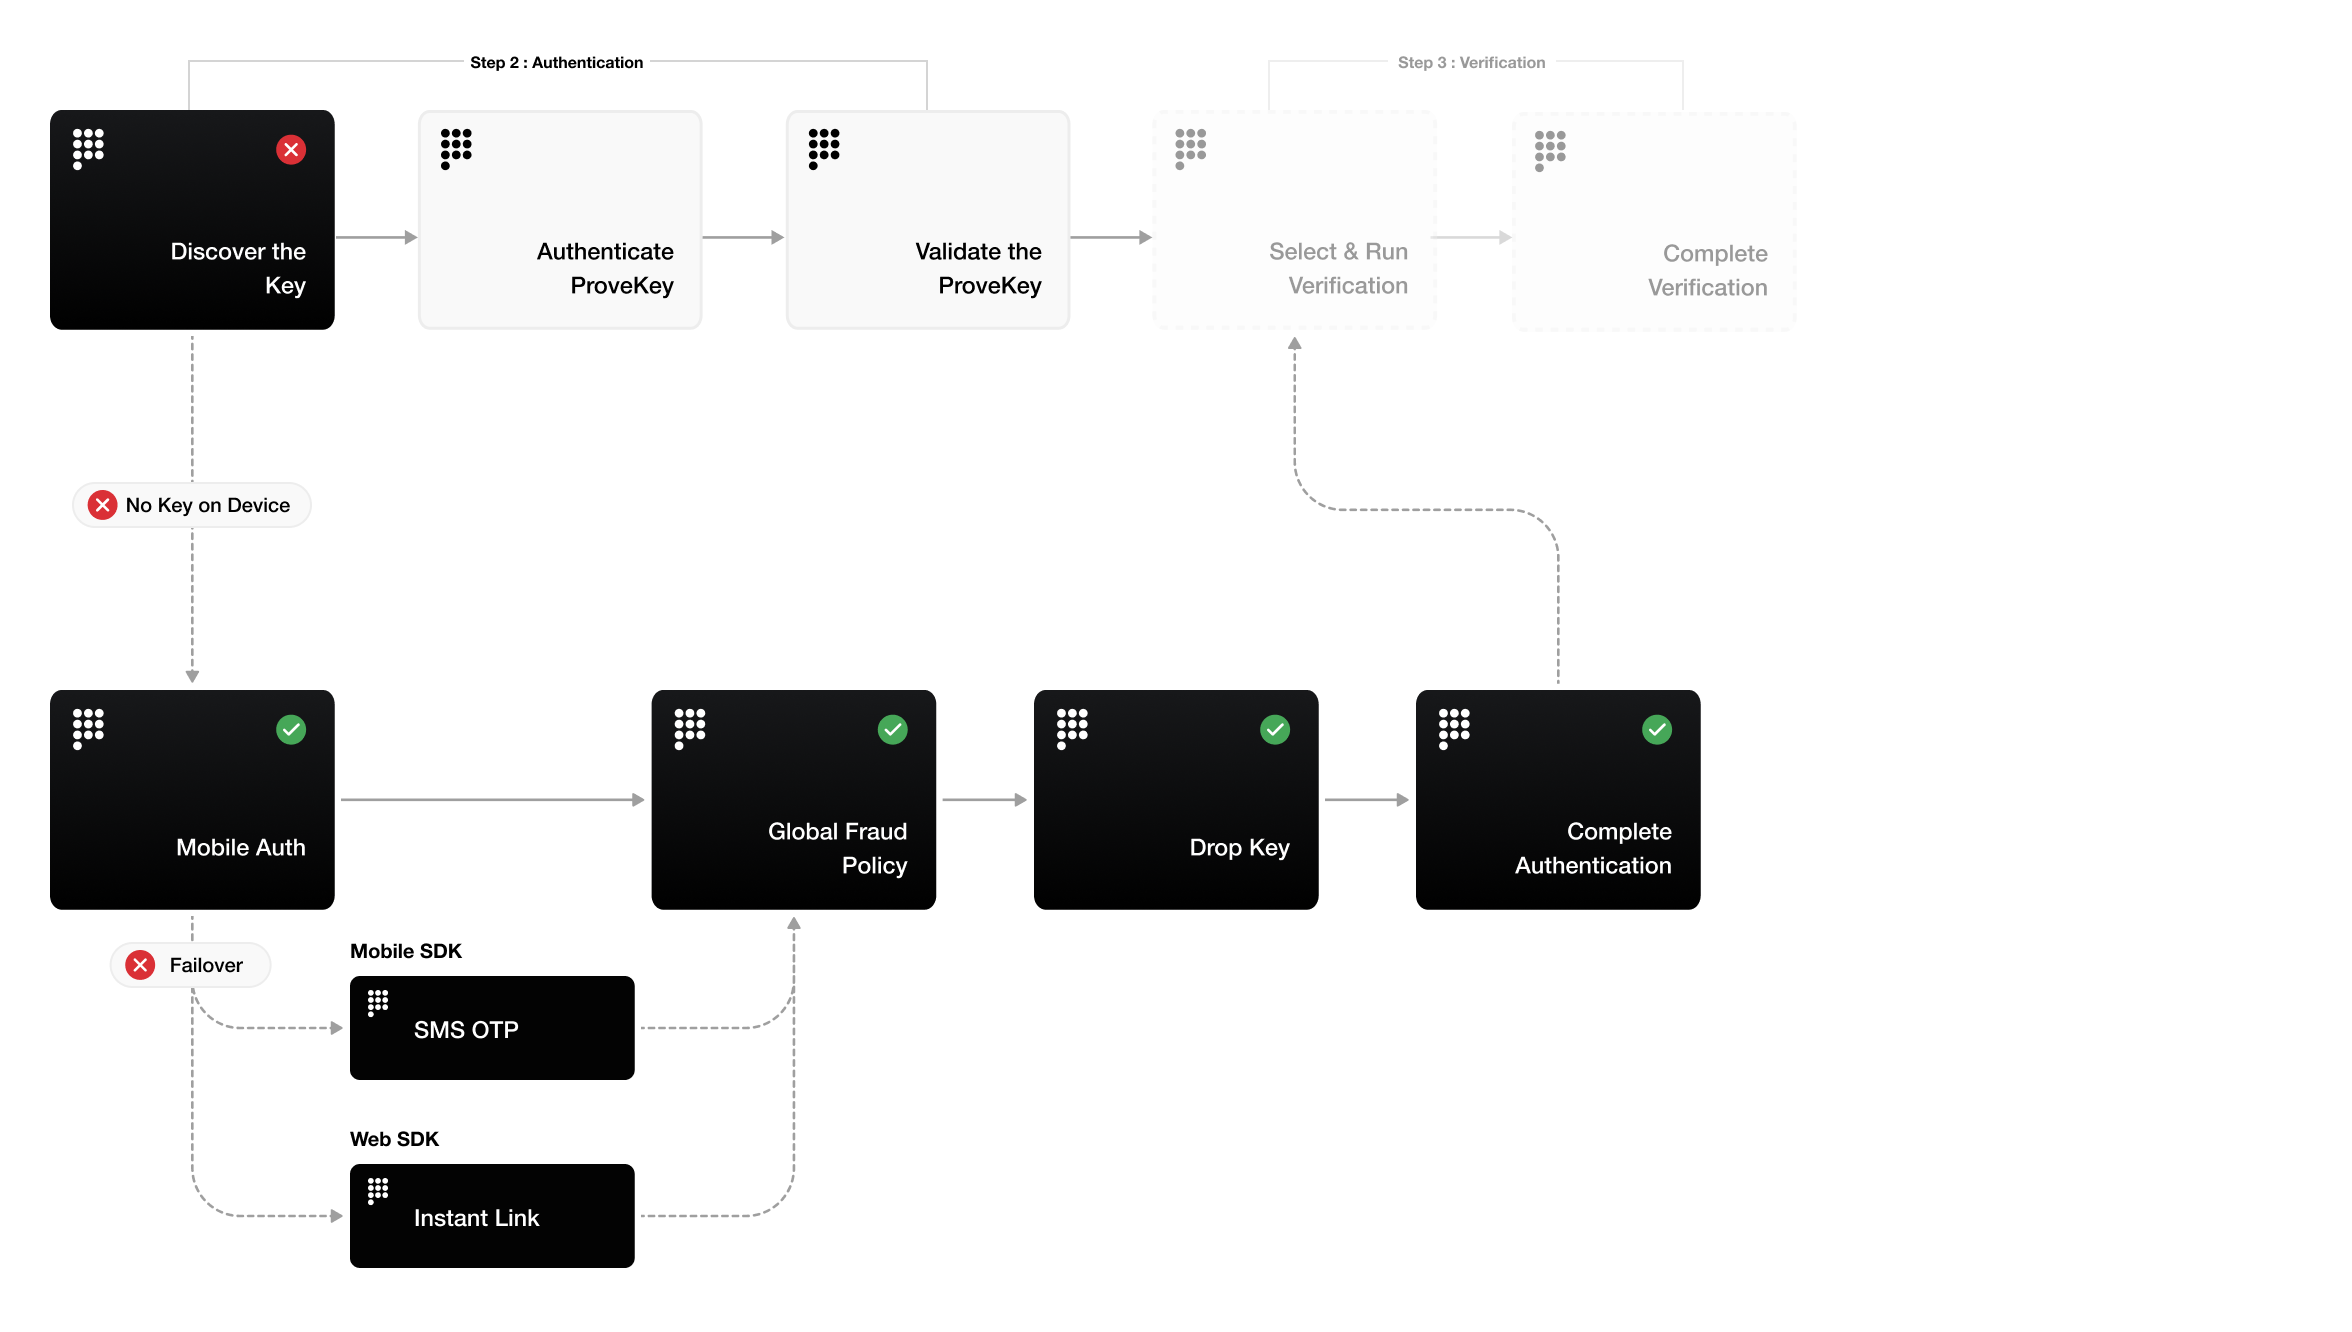
The Prove SDK simplifies and strengthens your authentication security by automatically choosing the correct authenticator based on trusted device recognition and authenticator availability - reducing friction while protecting against fraud.
- New to Network
- Return to Network
User has never interacted with Prove before or no ProveKey found.

Jump to Authentication Overview
3
Step 3: Verification
Prove offers a suite of verification solutions that leverage phone-centric identity technology to verify users and automate manual processes, creating a more secure and frictionless experience for both consumers and businesses.

Jump to Verification Overview
4
Step 4: Identity Management
Identity management helps businesses proactively manage consumers’ phone numbers and other vital identity attributes as they change throughout their lifecycle, providing continuous monitoring and alerts about identity changes.Once a user’s information is mapped to a Prove ID and enrolled in identity management, their information is accessible by the client to support ongoing operations, including:
- Cross-Domain Identity: Seeing where the same human user exists across different client domains.
- Marketplace Integration: Connecting the user base to other Prove products and services available in the marketplace.


