The Prove Platform Web SDK has an unpacked size of 324 KB, and a single dependency: @prove-identity/mobile-auth. Install the client-side SDK of your choice by running a command in your terminal, or by using a dependency management tool specific to your project.
# Run this command to install the package (ensure you have the latest version).npm install @prove-identity/prove-auth@3.4.2
If you’re including the file from jsDelivr and using Content Security Policy headers, ensure you add https://cdn.jsdelivr.net/npm/@prove-identity/ to script-src,
plus corresponding sha256-... or nonce-....
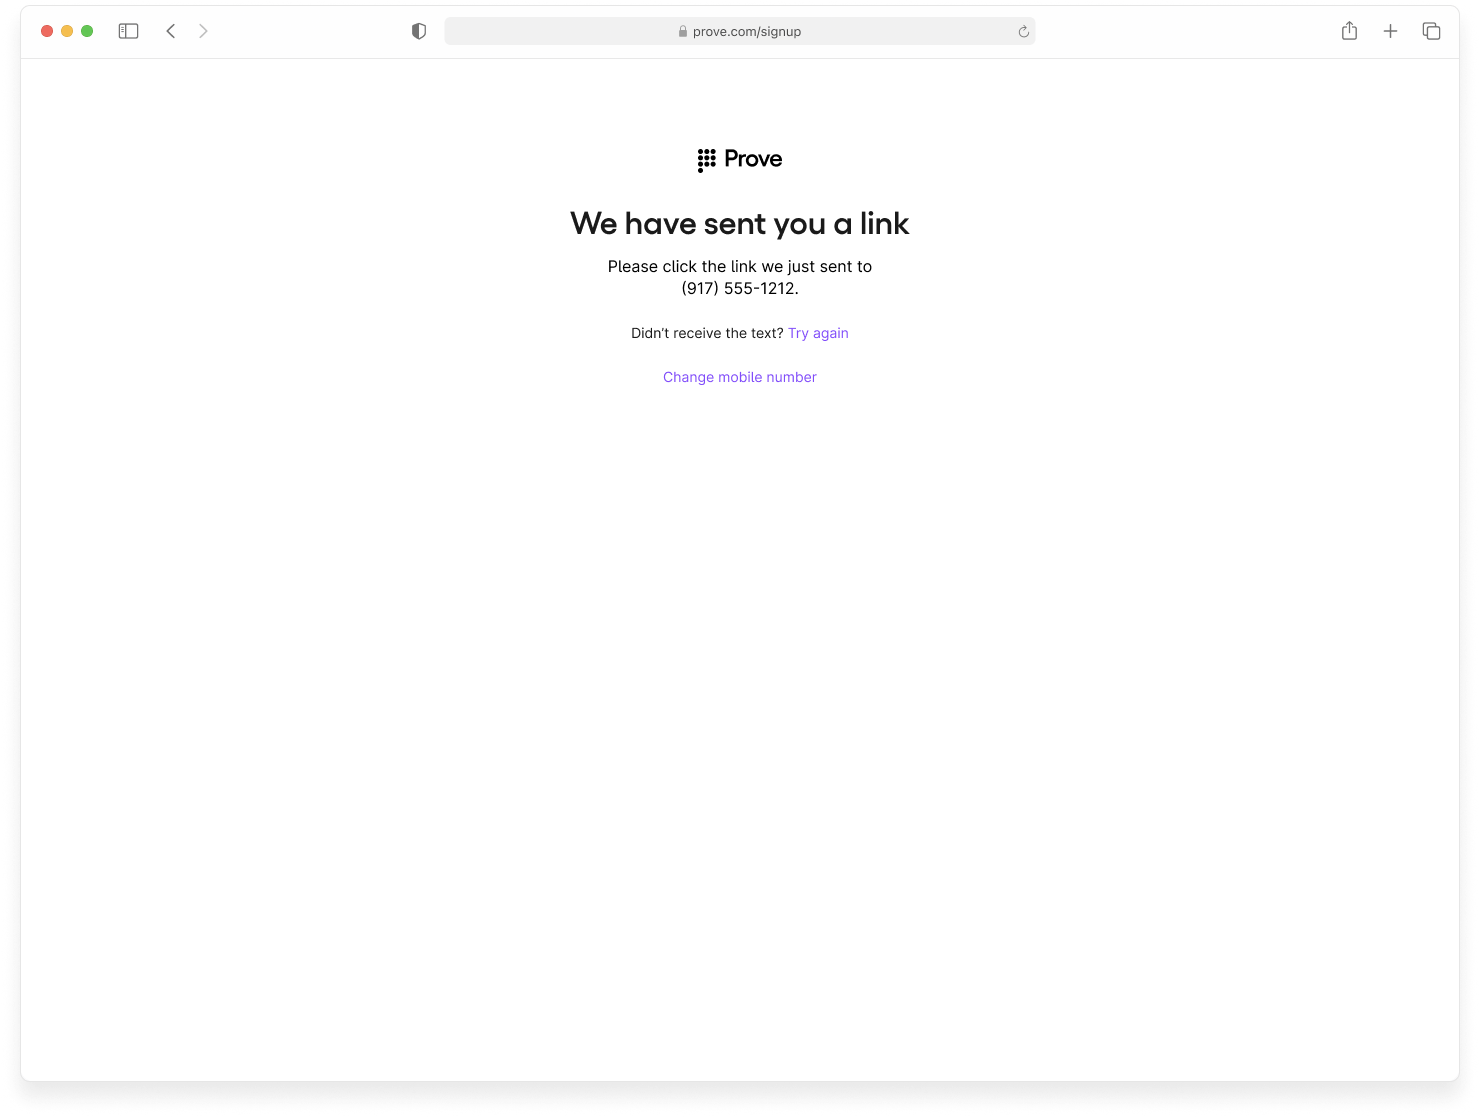
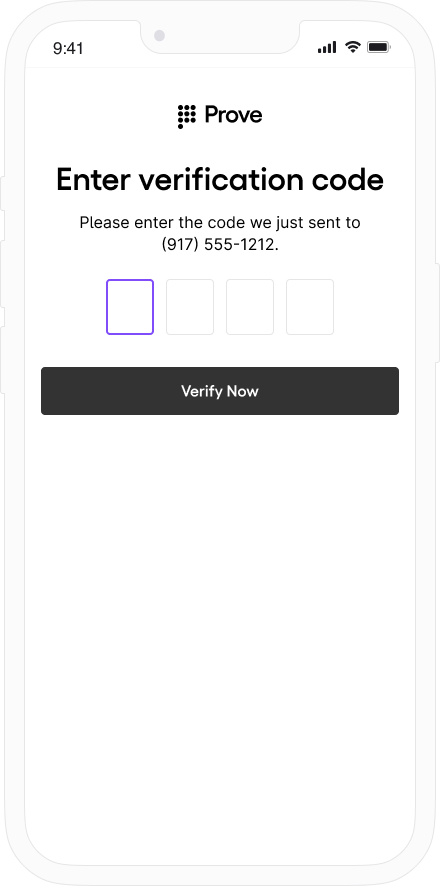
In a mobile flow, the mobile phone validates the one-time password (OTP). In a desktop flow, Instant Link sends a text message to the mobile phone for verification.In the mobile flow, once OTP validation completes, the AuthFinishStep callback finishes.In the desktop flow, a WebSocket opens for up to 5 minutes on the desktop browser while the customer opens the link in the text message. When they do, the WebSocket closes and the AuthFinishStep callback finishes.
The Web SDK requires an authToken for Authenticate(). That value comes from your server after it calls POST /v3/unify (often exposed to the browser through your own start or initialize endpoint). The token is session-specific (one flow) and expires after about 15 minutes.
You must integrate the client-side SDK for possession checks and the Prove Key.
1
Determine Type of Flow
Decide if the customer is on a mobile or desktop browser using this example. If the isMobile is true, set mobile as the flowType for the Start() function on the server, otherwise you can set desktop:
// Check if the customer is on a mobile or desktop browser.const authCheck = new proveAuth.AuthenticatorBuilder().build();let isMobile = authCheck.isMobileWeb()
2
Initialize the Flow
Mobile Auth in the United States doesn’t require a phone number, but all other countries do.
Send a request to your back end server with the phone number and possession type to start the flow. See POST /v3/unify for all request fields, optional parameters (for example finalTargetURL, deviceId, allowOTPRetry), and the full response.
For OTP retries (allowOTPRetry), implement the client SDK behavior in the Authenticate step.
Return the authToken to the client for Authenticate(). Persist correlationId for UnifyStatus(). See POST /v3/unify for all response fields, JWT behavior, and session timing.Example: browser requests authToken from your backendSend possession type and an optional phone number when your flow uses Prove possession to your server. Your server calls Prove and returns the token to the page.
Once you have the authToken, build the authenticator for both the mobile and desktop flows.
Mobile Auth Implementations OnlyIf your app uses Content Security Policy headers, you must configure them to allow connections to Prove’s authentication services:Sandbox Environment
https://device.uat.proveapis.com:4443
https://device.uat.proveapis.com
http://device.uat.proveapis.com:4443
http://device.uat.proveapis.com
Production Environment
https://device.proveapis.com:4443
https://device.proveapis.com
http://device.proveapis.com:4443
http://device.proveapis.com
https://auth.svcs.verizon.com:22790
Failure to configure these settings prevents Mobile Auth capability from working correctly in web flows.AT&T Carrier Support (Pixel Mode)If support for the AT&T carrier is also required, you must use Pixel mode (withMobileAuthImplementation("pixel")) with the following Content Security Policy (CSP) configuration:Allowed domain for Sandbox Environment
https://att-device.uat.proveapis.com:4443
https://att-device.uat.proveapis.com
https://device.uat.proveapis.com:4443
https://device.uat.proveapis.com
http://device.uat.proveapis.com:4443
http://device.uat.proveapis.com
Allowed domain for Production Environment
https://device.proveapis.com:4443
https://device.proveapis.com
http://device.proveapis.com:4443
http://device.proveapis.com
https://auth.svcs.verizon.com:22790
https://att-device.proveapis.com:4443
https://att-device.proveapis.com
https://snap.att.com
https://snap.mobile.att.com
https://snap.mobile.att.net
Add img-src for Pixel implementationExample img-src for Pixel mode:
For desktop mode, Prove ignores the Prove Key and runs Instant Link.
async function authenticate(isMobileWeb, authToken) { // Set up the authenticator for either mobile or desktop flow. let builder = new proveAuth.AuthenticatorBuilder(); if (isMobileWeb) { // Set up Mobile Auth and OTP. builder = builder .withAuthFinishStep((input) => verify(input.authId)) // If support for AT&T carrier is required, pixel mode should be selected via // .withMobileAuthImplementation("pixel") // otherwise, "fetch" mode should be preferred by default .withMobileAuthImplementation("fetch") .withOtpFallback(otpStart, otpFinish); } else { // Set up Instant Link. builder = builder .withAuthFinishStep((input) => verify(input.authId)) .withInstantLinkFallback(instantLink) .withRole("secondary"); } const authenticator = builder.build(); // Authenticate with the authToken. return authenticator.authenticate(authToken);}
Use this section to configure SMS OTP fallback in the Web SDK: wire OtpStartStep and OtpFinishStep so the SDK can send the code, collect the PIN, and optionally support resend, OTP retry, or phone-number change.
After Prove sends the SMS, the customer has about two minutes to enter the OTP before the session times out.
When building the authenticator, call withOtpFallback(startStep: OtpStartStep | OtpStartStepFn, finishStep: OtpFinishStep | OtpFinishStepFn) and implement both OtpStartStep and OtpFinishStep. Return the phone number from your start step as an object with a phoneNumber field passed to resolve(...); use reject('message') when collection fails. The Prove client SDK orchestrates when each step runs—do not duplicate that orchestration in app code (see Invalid OTP and step orchestration below).
Invalid OTP and step orchestrationWhen the customer enters an invalid OTP, the Prove client SDK detects it and may surface activity related to AuthFinishStep that looks unexpected. This behavior is expected.Do not add your own extra invocation of the OTP finish step to pass the error in otpError. The SDK runs your OtpFinishStep when retry or error UI is needed.Implement the required step functions, but let the Prove client SDK orchestrate when each step runs.
Open the tab that matches how the phone number is collected and which OTP options you need.
Default
Prompt for Phone Number
Resend
Retry OTP
Phone Number Change
Use this path when the server already has the phone number (for example from POST /v3/start or your server Start wrapper) and the browser must not prompt for it again.Call resolve(null) (or the equivalent in your snippet) so the SDK knows the customer agreed to receive the SMS. Follow the sample for the exact resolve shape your SDK version expects.
function otpStartStep(phoneNumberNeeded, phoneValidationError) { return new Promise((resolve, reject) => { // Since no phone number is needed, don't prompt the user. resolve(null); });}
Call reject('some error message') if something prevents sending the SMS or completing the flow (for example the customer cancels or leaves the UI with the back button).In the finish step, return the OTP through resolve(result: OtpFinishResult) with the OnSuccess result type and the value wrapped in OtpFinishInput, as in the snippet below.
function otpFinishStep(otpError) { return new Promise((resolve, reject) => { // If error message is found, handle it. if (otpError) { // Set to a variable and display it in a field. // In this example, we don't do anything with the error. var someErrorMessage = otpError.message; } // Prompt the user for whether they received the SMS. // Typically, this is a page that shows the OTP already. We are simplifying // it by requiring an input. var input = confirm('Did you receive a text message?'); if (!input) { // Close the modal if a text message was not received. return; } // Prompt the user for the OTP. var otp = prompt('Enter OTP code:'); if (otp) { // If the input is valid and the user clicked `OK`, return the OTP. resolve({ input: { otp }, // OTP value resultType: 0, // OnSuccess enum type = 0 }); } else { // Else, exit the flow. reject('phone invalid or user cancelled'); } });}
Use this path when the page collects the phone number in the browser and you do not need SMS resend, dedicated OTP retry handling beyond defaults, or phone-number change. For those capabilities, use Resend, Retry OTP, or Phone Number Change.In the start step, call resolve(input) with an object that includes the collected phoneNumber.
function otpStartStep(phoneNumberNeeded, phoneValidationError) { return new Promise((resolve, reject) => { // If no phone number is needed, then don't prompt the user. if (!phoneNumberNeeded) { resolve(null); return; } // If error message is found around phone number, handle it. // The `phoneValidationError` is ONLY available when `phoneNumberNeeded` // has a value. if (phoneValidationError) { // Set to a variable and display it in a field. // In this example, we don't do anything with the error. var someErrorMessage = phoneValidationError.message; } // Prompt the user for the phone number. var input = prompt('Enter phone number:'); if (input) { // If the input is valid and the user clicked `OK`, return the phone // number. resolve({ phoneNumber: input, }); } else { // Else, exit the flow. reject('phone invalid or user cancelled'); } });}
Implement the finish step:
function otpFinishStep(otpError) { return new Promise((resolve, reject) => { // If error message is found, handle it. if (otpError) { // Set to a variable and display it in a field. // In this example, we don't do anything with the error. var someErrorMessage = otpError.message; } // Prompt the user for whether they received the SMS. // Typically, this is a page that shows the OTP already. We are simplifying // it by requiring an input. var input = confirm('Did you receive a text message?'); if (!input) { // Close the modal if a text message was not received. return; } // Prompt the user for the OTP. var otp = prompt('Enter OTP code:'); if (otp) { // If the input is valid and the user clicked `OK`, return the OTP. resolve({ input: { otp }, // OTP value resultType: 0, // OnSuccess enum type = 0 }); } else { // Else, exit the flow. reject('phone invalid or user cancelled'); } });}
To use the Resend/Retry/Phone Change features, install the Web SDK version 2.15.1 or later.
Allow a new OTP SMS to the same number (up to three send attempts including the first).Implement the start step:
function otpStartStep(phoneNumberNeeded, phoneValidationError) { return new Promise((resolve, reject) => { // If no phone number is needed, then don't prompt the user. if (!phoneNumberNeeded) { resolve(null); return; } // If error message is found around phone number, handle it. // The `phoneValidationError` is ONLY available when `phoneNumberNeeded` // has a value. if (phoneValidationError) { // Set to a variable and display it in a field. // In this example, we don't do anything with the error. var someErrorMessage = phoneValidationError.message; } // Prompt the user for the phone number. var input = prompt('Enter phone number:'); if (input) { // If the input is valid and the user clicked `OK`, return the phone // number. resolve({ phoneNumber: input, }); } else { // Else, exit the flow. reject('phone invalid or user cancelled'); } });}
Then implement the finish step so the customer can request another SMS, for example:
function otpFinishStep(otpError) { return new Promise((resolve, reject) => { // If error message is found, handle it. if (otpError) { // Set to a variable and display it in a field. // In this example, we don't do anything with the error. var someErrorMessage = otpError.message; } // Prompt the user for whether they received the SMS. // Typically, this is a page that shows the OTP already. We are simplifying // it by requiring an input. var input = confirm('Did you receive a text message?'); if (!input) { // If `Cancel`, then resend to the same phone number. resolve({ resultType: 1, // OnResendOtp enum type = 1 }); return; } // Prompt the user for the OTP. var otp = prompt('Enter OTP code:'); if (otp) { // If the input is valid and the user clicked `OK`, return the OTP. resolve({ input: { otp }, // OTP value resultType: 0, // OnSuccess enum type = 0 }); } else { // Else, exit the flow. reject('phone invalid or user cancelled'); } });}
To use the Resend/Retry/Phone Change features, install the Web SDK version 2.15.1 or later.
Allow the customer to re-enter the OTP after a wrong PIN (up to three attempts). On the server, pass allowOTPRetry=true on POST /v3/start (or your equivalent Start request).Implement the start step—no extra client changes beyond your normal prompt path:
function otpStartStep(phoneNumberNeeded, phoneValidationError) { return new Promise((resolve, reject) => { // If no phone number is needed, then don't prompt the user. if (!phoneNumberNeeded) { resolve(null); return; } // If error message is found around phone number, handle it. // The `phoneValidationError` is ONLY available when `phoneNumberNeeded` // has a value. if (phoneValidationError) { // Set to a variable and display it in a field. // In this example, we don't do anything with the error. var someErrorMessage = phoneValidationError.message; } // Prompt the user for the phone number. var input = prompt('Enter phone number:'); if (input) { // If the input is valid and the user clicked `OK`, return the phone // number. resolve({ phoneNumber: input, }); } else { // Else, exit the flow. reject('phone invalid or user cancelled'); } });}
Implement the finish step—no extra client changes. If the OTP is invalid, the finish step drives retry UI until attempts are exhausted, then AuthFinish runs.
function otpFinishStep(otpError) { return new Promise((resolve, reject) => { // If error message is found, handle it. if (otpError) { // Set to a variable and display it in a field. // In this example, we don't do anything with the error. var someErrorMessage = otpError.message; } // Prompt the user for whether they received the SMS. // Typically, this is a page that shows the OTP already. We are simplifying // it by requiring an input. var input = confirm('Did you receive a text message?'); if (!input) { // Close the modal if a text message was not received. return; } // Prompt the user for the OTP. var otp = prompt('Enter OTP code:'); if (otp) { // If the input is valid and the user clicked `OK`, return the OTP. resolve({ input: { otp }, // OTP value resultType: 0, // OnSuccess enum type = 0 }); } else { // Else, exit the flow. reject('phone invalid or user cancelled'); } });}
To use the Resend/Retry/Phone Change features, install the Web SDK version 2.15.1 or later.
Allow the customer to re-enter the phone number (up to three entries/send attempts).
Manual Request RequiredTo enable phone number change capabilities on your credentials, contact your Prove representative.
Implement the start step:
function otpStartStep(phoneNumberNeeded, phoneValidationError) { return new Promise((resolve, reject) => { // If no phone number is needed, then don't prompt the user. if (!phoneNumberNeeded) { resolve(null); return; } // If error message is found around phone number, handle it. // The `phoneValidationError` is ONLY available when `phoneNumberNeeded` // has a value. if (phoneValidationError) { // Set to a variable and display it in a field. // In this example, we don't do anything with the error. var someErrorMessage = phoneValidationError.message; } // Prompt the user for the phone number. var input = prompt('Enter phone number:'); if (input) { // If the input is valid and the user clicked `OK`, return the phone // number. resolve({ phoneNumber: input, }); } else { // Else, exit the flow. reject('phone invalid or user cancelled'); } });}
Then implement the finish step so the customer can supply a new number, for example:
function otpFinishStep(otpError) { return new Promise((resolve, reject) => { // If error message is found, handle it. if (otpError) { // Set to a variable and display it in a field. // In this example, we don't do anything with the error. var someErrorMessage = otpError.message; } // Prompt the user for whether they received the SMS. // Typically, this is a page that shows the OTP already. We are simplifying // it by requiring an input. var input = confirm('Did you receive a text message?'); if (!input) { // If `Cancel`, then trigger the otpStartStep to re-prompt for // phone number. resolve({ resultType: 2, // OnMobileNumberChange enum type = 2 }); return; } // Prompt the user for the OTP. var otp = prompt('Enter OTP code:'); if (otp) { // If the input is valid and the user clicked `OK`, return the OTP. resolve({ input: { otp }, // OTP value resultType: 0, // OnSuccess enum type = 0 }); } else { // Else, exit the flow. reject('phone invalid or user cancelled'); } });}
2
Verify the integration
In Sandbox, walk each shipped path (default, prompt, resend, retry if enabled, phone change if enabled). Confirm SMS delivery, OTP entry within the timeout, and that you never stack extra OtpFinishStep invocations on top of the SDK’s invalid-OTP handling—the SDK should remain the single orchestrator for retries and errors.
Use this section to configure the Web SDK so Instant Link SMS can be sent from the browser flow and optional resend or phone-number change behaves as expected.
Instant Link for mobile web isn’t supported.
Custom or vanity Instant Links aren’t supported. You can’t substitute a custom link for the default Instant Link.
Integrate on desktop (or other supported) web; see the callout above for mobile web.
When building the authenticator, use withInstantLinkFallback(startStep: InstantLinkStartStep | InstantLinkStartStepFn, retryStep?: InstantLinkRetryStep | InstantLinkRetryStepFn). Implement InstantLinkStartStep in every flow. Add InstantLinkRetryStep only if you support Resend or Phone Number Change (see those tabs). Return the phone number from your step as an object with a phoneNumber field passed to resolve(...); use reject('message') when collection fails.
Implement the Instant Link start and optional retry
Open the tab that matches how the phone number is collected and sent to Prove.
Default
Prompt for Phone Number
Resend
Phone Number Change
Use this path when the server already has the phone number (for example from POST /v3/start or your server Start wrapper) and the browser must not prompt again.Call resolve(null) (or the equivalent in your snippet) so the SDK knows the customer agreed to receive the SMS. Follow the sample for the exact resolve shape your SDK version expects.
function instantLinkStartStep(phoneNumberNeeded, phoneValidationError) { return new Promise((resolve, reject) => { // Since no phone number is needed, don't prompt the user. resolve(null); });}
Use this path when the page collects the number in the browser and you do not need resend or phone-number change. For resend or change, use the other tabs.Call resolve(input) with an object that includes the collected phoneNumber. Call reject('some error message') if collection fails, the customer cancels, or they leave the Instant Link start UI (for example with the back button).
function instantLinkStartStep(phoneNumberNeeded, phoneValidationError) { return new Promise((resolve, reject) => { // If no phone number is needed, then don't prompt the user. if (!phoneNumberNeeded) { resolve(null); return; } // If error message is found around phone number, handle it. // The `phoneValidationError` is ONLY available when `phoneNumberNeeded` // has a value. if (phoneValidationError) { // Set to a variable and display it in a field. // In this example, we don't do anything with the error. var someErrorMessage = phoneValidationError.message; } // Prompt the user for the phone number. var input = prompt('Enter phone number:'); if (input) { // If the input is valid and the user clicked `OK`, return the phone // number. resolve({ phoneNumber: input, }); } else { // Else, exit the flow. reject('phone invalid or user cancelled'); } });}
To use the Resend/Retry/Phone Number Change features, install the Web SDK version 2.15.1 or later.
Allow a new SMS to the same number (up to three send attempts including the first).Implement the start step:
function instantLinkStartStep(phoneNumberNeeded, phoneValidationError) { return new Promise((resolve, reject) => { // If no phone number is needed, then don't prompt the user. if (!phoneNumberNeeded) { resolve(null); return; } // If error message is found around phone number, handle it. // The `phoneValidationError` is ONLY available when `phoneNumberNeeded` // has a value. if (phoneValidationError) { // Set to a variable and display it in a field. // In this example, we don't do anything with the error. var someErrorMessage = phoneValidationError.message; } // Prompt the user for the phone number. var input = prompt('Enter phone number:'); if (input) { // If the input is valid and the user clicked `OK`, return the phone // number. resolve({ phoneNumber: input, }); } else { // Else, exit the flow. reject('phone invalid or user cancelled'); } });}
Then implement InstantLinkRetryStep so the customer can request another SMS, for example:
function instantLinkRetryStep() { return new Promise((resolve, reject) => { // There are multiple return options: // - resolve(0): request resend to the same phone number // - reject('user clicked cancel'): error out of the possession flow // Prompt the user for the phone number. // Typically, this is a page that is automatically closed or redirected // once the `AuthFinish` function is called. We are simplifying it by // requiring an input. var input = confirm('Did you receive a text message?'); if (input) { // If `OK`, close the modal. return; } // Else `Cancel`, then resend to the same phone number. resolve(0); });}
To use the Resend/Retry/Phone Number Change features, install the Web SDK version 2.15.1 or later.
Allow the customer to re-enter the phone number (up to three entries/send attempts).
Manual Request RequiredTo enable phone number change capabilities on your credentials, contact your Prove representative.
Implement the start step:
function instantLinkStartStep(phoneNumberNeeded, phoneValidationError) { return new Promise((resolve, reject) => { // If no phone number is needed, then don't prompt the user. if (!phoneNumberNeeded) { resolve(null); return; } // If error message is found around phone number, handle it. // The `phoneValidationError` is ONLY available when `phoneNumberNeeded` // has a value. if (phoneValidationError) { // Set to a variable and display it in a field. // In this example, we don't do anything with the error. var someErrorMessage = phoneValidationError.message; } // Prompt the user for the phone number. var input = prompt('Enter phone number:'); if (input) { // If the input is valid and the user clicked `OK`, return the phone // number. resolve({ phoneNumber: input, }); } else { // Else, exit the flow. reject('phone invalid or user cancelled'); } });}
Then implement InstantLinkRetryStep to collect a new number, for example:
function instantLinkRetryStep() { return new Promise((resolve, reject) => { // There are multiple return options: // - resolve(0): request resend to the same phone number // - resolve(1): request phone number change/re-prompt // - reject('user clicked cancel'): error out of the possession flow // Prompt the user for the phone number. // Typically, this is a page that is automatically closed or redirected // once the `AuthFinish` function is called. We are simplifying it by // requiring an input. var input = confirm('Did you receive a text message?'); if (input) { // If `OK`, close the modal. return; } // Else `Cancel`, then trigger the instantLinkStartStep to re-prompt for // phone number. resolve(1); });}
2
Verify the integration
In Sandbox, run through each path you ship (default, prompt, and any retry flows). Confirm the SMS sends, the customer can complete the link within the timeout window, and resolve / reject match the UX you expect when the customer cancels or retries.
In the desktop flow, a WebSocket opens for up to 5 minutes on the desktop browser while waiting for the customer to select the link in the text message. Once clicked, the WebSocket closes and the AuthFinishStep function finishes.If your UI already has flowType from the server (mobile or desktop), you can configure the builder from that value instead of isMobileWeb():
const isMobileWeb = flowType === "mobile";const isDesktop = flowType === "desktop";let builder = new proveAuth.AuthenticatorBuilder();if (isMobileWeb) { builder = builder .withAuthFinishStep((input) => verify(input.authId)) // If support for AT&T carrier is required, pixel mode should be selected via // .withMobileAuthImplementation("pixel") // otherwise, "fetch" mode should be preferred by default .withMobileAuthImplementation("fetch") .withOtpFallback(otpStart, otpFinish);} else if (isDesktop) { builder = builder .withAuthFinishStep((input) => verify(input.authId)) .withInstantLinkFallback(instantLink) .withRole("secondary");} else { builder = builder.withAuthFinishStep((input) => verify(input.authId));}const authenticator = builder.build();await authenticator.authenticate(authToken);
In the AuthFinishStep, specify a function to call once the possession checks complete on the mobile phone. This endpoint on your back end server calls the UnifyStatus() function to validate the phone number. The AuthFinishStep then completes. If the user cancels the client flow, your backend should still call UnifyStatus(); you may receive success=false.
If you’re using Content Security Policy headers, ensure you allow connect-src for wss://*.prove-auth.proveapis.com, wss://device.uat.proveapis.com, and wss://device.proveapis.com as required for your environment.
Prove Key validity: Prove deactivates the key on our servers after an extended period of inactivity (each successful authentication resets that period). On iOS, the Prove Key remains on the device after uninstall and reinstall. Key Persistence is available for the Web SDK only—not the native Android SDK. Pass rebind on /v3/unify to force a full possession check when needed. See Prove Key validity and expiration.
Prove Key persistence enhancementUsing Prove Key in web applications can be affected by strict browser privacy policies aimed at preventing cross-site tracking. For example, Safari completely disables third-party cookies and limits the lifetime of all script-writable website data. Prove Auth uses script-writable website data (localStorage and IndexedDB) for storing Prove Auth deviceId, crypto key material, and other critical metadata for subsequent device re-authentication.If the browser deletes this script-writable data, Prove Auth is no longer able to recognize the device and perform authentication. To mitigate this limitation and avoid repeating the device registration process, follow these steps to enable Key Persistence.
The Key Persistence feature is not enabled by default. Contact Prove to enable this add-on feature.
Web app setupFollow these steps to add Prove Key persistence in your web app:
1
Install the Key Persistence Module
Install the Key Persistence integration module and add activation code to your app:
Additionally, if you’re including the file from jsDelivr, add https://cdn.jsdelivr.net/npm/@prove-identity/ to script-src,
plus corresponding sha256-... or nonce-....
2
Configure the Authenticator Builder
When configuring authenticatorBuilder for any flow, add the withDeviceContext() method to enable Key Persistence data collection:
// Prove supports integration within the US and EU regions for Key Persistence data collection// The public API Key for each build config will be provided by Proveconst publicApiKey = "apiKeyAssignedForThisBuildConfig";const buildConfig = BuildConfig.US_UAT;const options = { publicApiKey: publicApiKey, buildConfig: buildConfig,};// Enable Key Persistence data with builder methodlet builder = new proveAuth.AuthenticatorBuilder();builder = builder .withAuthFinishStep((input) => verify(input.authId)) // If support for AT&T carrier is required, pixel mode should be selected via // .withMobileAuthImplementation("pixel") // otherwise, "fetch" mode should be preferred by default .withMobileAuthImplementation("fetch") .withOtpFallback(otpStart, otpFinish) .withDeviceContext(options);const authenticator = builder.build();
Call authenticatorBuilder.build() immediately after the web app loads. This enables the Web SDK to load components for Key Persistence collection and collect signals before authentication begins, which helps decrease latency.
3
Enable Cookies for Auth Requests
Ensure cookies are enabled when you call AuthStart and AuthFinish:
// Enable cookies for AuthStartaxios.post(backendUrl + '/authStart', data, { withCredentials: true });// Enable cookies for AuthFinishaxios.post(backendUrl + '/authFinish', data, { withCredentials: true });
Handling multiple device registrationsIf a user registers their device many times before using Key Persistence, Prove Auth may have many registration candidates matching the same visitor ID. To improve recovery accuracy:
Store the deviceId returned from successful authentications in your backend (database or web cookie)
Pass the stored deviceId with the /unify request to specify which registration to restore
// Send the Unify request with deviceId for registration recoveryrspUnify, err := client.V3.V3UnifyRequest(ctx, &components.V3UnifyRequest{ PhoneNumber: "2001004014", PossessionType: "mobile", DeviceId: provesdkservergo.String("stored-device-id-from-previous-auth"),})
Continue the flow using the response from POST /v3/unify. Return updated session or auth details to the client as needed. Interpret evaluation using the Global Fraud Policy when present.
If you send a different phone number to /unify than the one registered to the Prove key, success=false returns when calling /unify-status. This is because the Prove Key is bound to a different number. Run the flow again with rebind=true in the /unify endpoint. This forces a full possession check and then, if valid, rebinds the Prove Key to the new phone number.
Use this test user when performing initial testing with cURL or Postman. This test user skips the client-side SDK authentication to walk you through the sequence of API calls.
North America
International
Phone Number
First Name
Last Name
2001004018
Barbaraanne
Canet
Phone Number
First Name
Last Name
+2001004029
Janos
Martina
After initial short-term testing, implement the client-side SDK and use the remaining test users to test your implementation.
Follow the Testing Steps for expected behavior per step. These users allow you to test “Prove Possession” and “Customer-Supplied Possession with Force Bind” flows.
Follow the Testing Steps for expected behavior per step. These users allow you to test “Prove Possession” and “Prove Passive Authentication with Customer-Supplied Possession Fallback” flows.
When a tab includes both flows, follow the steps below on mobile first. On desktop, keep the same Prompt customer and Verify mobile number timing; only these parts change:
Initiate Start Request — The front end also sends final target URL with the phone number and possession type before /unify.
Send Auth Token to the Front End — The client completes Instant Link instead of OTP or Mobile Auth.
Verify Mobile Number — On success, expect proveId and phoneNumber only. On failure, expect the same success=false and phoneNumber behavior as on mobile.
Lorant
Laney
Inge
Penny
Bertie
Bonnie
Allissa
Wendy
Amii
Revoke Key
Fail
Mobile and desktop: This user passes Prove possession; POST /v3/unify-status returns success=true. On desktop there is no Prove Key.
1
Prompt Customer
Start the onboarding flow on the initial screen and enter the phone number for Lorant Nerger.
2
Initiate Start Request
Your front end sends the phone number and possession type to the back end. Your back end sends the phone number to the /unify endpoint. The response provides an auth token, correlation ID, and success=pending.
3
Send Auth Token to the Front End
Your back end sends the authToken to the front end. The front end runs OTP handling. Enter 1234 to simulate a successful OTP.
4
Verify Mobile Number
Once the front end finishes the possession check, the back end calls POST /v3/unify-status with the correlation ID to validate the phone number.
Expect success=true, proveId, deviceId, and phoneNumber in Sandbox. See POST /v3/unify-status for the full response.You have a successful flow and a Prove key for this phone number. Sending this user through again bypasses the possession check due to the Prove key. Send the user on through your authenticated flow.
Mobile and desktop: This user fails Prove possession; POST /v3/unify-status returns success=false.
1
Prompt Customer
Start the onboarding flow on the initial screen and enter the phone number for Laney Dyball.
2
Initiate Start Request
Your front end sends the phone number and possession type to the back end. Your back end sends the phone number to the /unify endpoint. The response provides an auth token, correlation ID, and success=pending.
3
Send Auth Token to the Front End
Your back end sends the authToken to the front end. The front end runs OTP handling. Enter 1111 to simulate an unsuccessful OTP.
4
Verify Mobile Number
Once the front end finishes the possession check, the back end calls POST /v3/unify-status with the correlation ID to validate the phone number.
Expect success=false and phoneNumber. See POST /v3/unify-status.The test user failed. Send the user through your exception process.
Mobile: Test passive authentication with customer-supplied possession fallback; Mobile Auth passes and POST /v3/unify-status returns success=true.
1
Prompt Customer
Start the onboarding flow on the initial screen and enter the phone number for Inge Galier.
2
Initiate Start Request
Your front end sends the possession type to the back end. Your back end calls the /unify endpoint. The response provides an auth token, correlation ID, and success=pending.
3
Send Auth Token to the Front End
Your back end sends the authToken to the front end. The front end runs Mobile Auth.
4
Verify Mobile Number
Once the front end finishes the possession check, the back end calls POST /v3/unify-status with the correlation ID to validate the phone number.
Expect success=true, proveId, deviceId, and phoneNumber from Mobile Auth in Sandbox. See POST /v3/unify-status for the full response.You have a successful flow and a Prove key tied to this phone number. Sending this user through again bypasses the possession check due to the Prove key. Send the user on through your authenticated flow.
If you are testing the reputation check flow by sending checkReputation=true in the /unify request, Penny fails the reputation check and returns success=false in the final response.
On mobile, Mobile Auth fails and OTP succeeds (1234); POST /v3/unify-status returns success=true.
1
Prompt Customer
Start the onboarding flow on the initial screen and enter the phone number for Penny Jowers.
2
Initiate Start Request
Your front end sends the phone number and possession type to the back end. Your back end sends the phone number to the /unify endpoint. The response provides an auth token, correlation ID, and success=pending.
3
Send Auth Token to the Front End
Your back end sends the authToken to the front end. The front end attempts Mobile Auth, which fails. The SDK then falls back to OTP handling. Enter 1234 to simulate a successful OTP.
4
Verify Mobile Number
Once the front end finishes the possession check, the back end calls POST /v3/unify-status with the correlation ID to validate the phone number.
Expect success=true, proveId, deviceId, and phoneNumber in Sandbox. See POST /v3/unify-status for the full response.You have a successful flow and a Prove key tied to this phone number. Sending this user through again bypasses the possession check due to the Prove key. Send the user on through your authenticated flow.
Mobile and desktop: This user passes Prove possession; POST /v3/unify-status returns success=true. On desktop there is no Prove Key.
1
Prompt Customer
Start the onboarding flow on the initial screen and enter the phone number for Bertie Fremont.
2
Initiate Start Request
Your front end sends the phone number and possession type to the back end. Your back end sends the phone number to the /unify endpoint. The response provides an auth token, correlation ID, and success=pending.
3
Send Auth Token to the Front End
Your back end sends the authToken to the front end. The front end runs OTP handling. Enter 1234 to simulate a successful OTP.
4
Verify Mobile Number
Once the front end finishes the possession check, the back end calls POST /v3/unify-status with the correlation ID to validate the phone number.
Expect success=true, proveId, deviceId, and phoneNumber in Sandbox. See POST /v3/unify-status for the full response.You have a successful flow and a Prove key tied to this phone number. Send the user on through your authenticated flow.
Mobile and desktop: This user fails Prove possession; POST /v3/unify-status returns success=false.
1
Prompt Customer
Start the onboarding flow on the initial screen and enter the phone number for Bonnie Sidon.
2
Initiate Start Request
Your front end sends the phone number and possession type to the back end. Your back end sends the phone number to the /unify endpoint. The response provides an auth token, correlation ID, and success=pending.
3
Send Auth Token to the Front End
Your back end sends the authToken to the front end. The front end runs OTP handling. Enter 1111 to simulate an unsuccessful OTP.
4
Verify Mobile Number
Once the front end finishes the possession check, the back end calls POST /v3/unify-status with the correlation ID to validate the phone number.
Expect success=false and phoneNumber. See POST /v3/unify-status.The test user failed. Send the user through your exception process.
Follow these steps to test the Prove Unified Authentication flow with Allissa Zoren on mobile. This user passes Mobile Auth and returns success=true in the /unify-status response.
1
Prompt Customer
Start the onboarding flow on the initial screen and enter the phone number for Allissa Zoren.
2
Initiate Start Request
Your front end sends the possession type to the back end. Your back end calls the /unify endpoint. The response provides an auth token, correlation ID, and success=pending.
3
Send Auth Token to the Front End
Your back end sends the authToken to the front end. The front end runs Mobile Auth.
4
Verify Mobile Number
Once the front end finishes the possession check, the back end calls POST /v3/unify-status with the correlation ID to validate the phone number.
Expect success=true, proveId, deviceId, and phoneNumber from Mobile Auth in Sandbox. See POST /v3/unify-status for the full response.You have a successful flow and a Prove key tied to this phone number. Sending this user through again bypasses the possession check due to the Prove key. Send the user on through your authenticated flow.
Follow these steps to test the Prove Unified Authentication flow with Wendy Strover on mobile. This user fails Mobile Auth and return success=false in the /unify-status response.
1
Prompt Customer
Start the onboarding flow on the initial screen and enter the phone number for Wendy Strover.
2
Initiate Start Request
Your front end sends the phone number and possession type to the back end. Your back end sends the phone number to the /unify endpoint. The response provides an auth token, correlation ID, and success=pending.
3
Send Auth Token to the Front End
Your back end sends the authToken to the front end. The front end fails Mobile Auth.
4
Verify Mobile Number
Once the front end finishes the possession check, the back end calls POST /v3/unify-status with the correlation ID to validate the phone number.
Expect success=false and phoneNumber. See POST /v3/unify-status.
If you are testing the reputation check flow by sending checkReputation=true in the /unify request, Amii fails the reputation check and returns success=false in the final response.
Follow these steps to test the Prove Unified Authentication flow with Amii Porritt on mobile. This user fails Mobile Auth but pass OTP and return success=true in the /unify-status response.
1
Prompt Customer
Start the onboarding flow on the initial screen and enter the phone number for Amii Porritt.
2
Initiate Start Request
Your front end sends the phone number and possession type to the back end. Your back end sends the phone number to the /unify endpoint. The response provides an auth token, correlation ID, and success=pending.
3
Send Auth Token to the Front End
Your back end sends the authToken to the front end. The front end attempts Mobile Auth, which fails. The SDK falls back to OTP handling. Enter 1234 to simulate a successful OTP.
4
Verify Mobile Number
Once the front end finishes the possession check, the back end calls POST /v3/unify-status with the correlation ID to validate the phone number.
Expect success=true, proveId, deviceId, and phoneNumber in Sandbox. See POST /v3/unify-status for the full response.You have a successful flow and a Prove key tied to this phone number. Sending this user through again bypasses the possession check due to the Prove key. Send the user on through your authenticated flow.
If you send Penny through Unified Authentication again, attempting to authenticate just using the Prove Key, the endpoint returns
Error Message
{ "code": 8019, "message": "device has been revoked"}
You must complete a new authentication flow to reestablish the Prove Key.
Follow these steps to test the Prove Unified Authentication flow with Lorant, Jesse, Bertie, or Wendy. This introduces failures into the flow and return success=false at various points.
Fail Validate (Mobile Flow)
1
Send Auth Token to the Front End
During the mobile flow, use 1111 to simulate a failed OTP.
Once the front end finishes the possession check, the back end calls the /unify-status endpoint with the correlation ID to validate the phone number.The user then fails /unify-status.