Documentation Index
Fetch the complete documentation index at: https://developer.prove.com/llms.txt
Use this file to discover all available pages before exploring further.
Possession requires both a client-side SDK and these platform APIs: Prerequisites
- Access token — Obtain a bearer token using Prove OAuth (Authentication). Use the same token for
POST /v3/unify, POST /v3/unify-status, and POST /v3/unify-bind.
- Server — Use a Prove server SDK or call those endpoints directly. Use the reference pages for full request bodies, optional fields, and responses.
- Client SDK — Install the Android SDK for possession checks and the Prove Key.
Implementation steps
You must integrate the client-side SDK for possession checks and the Prove Key.
Determine Type of Flow
When using the Android SDK, set mobile as the flowType for the Start() function on the server.
Initialize the Flow
Mobile Auth in the United States doesn’t require a phone number, but all other countries do.
POST /v3/unify for all request fields, optional parameters (for example finalTargetURL, deviceId, allowOTPRetry), and the full response.For OTP retries (allowOTPRetry), implement the client SDK behavior in the Authenticate step.
// Send the Unify request.
rspUnify, err := client.V3.V3UnifyRequest(ctx, &components.V3UnifyRequest{
  PhoneNumber:    "2001004014",
  PossessionType: "mobile",
  ClientRequestID: provesdkservergo.String("client-abc-123"),
  AllowOTPRetry: true,
})
if err != nil {
  t.Fatal(err)
}
authToken to the client for Authenticate(). Persist correlationId for UnifyStatus(). See POST /v3/unify for all response fields, JWT behavior, and session timing.Authenticate
Once you have the authToken, build the authenticator for both the mobile and desktop flows.Implement OTP or Instant Link - not both.
// Object implementing AuthFinishStep interface
AuthFinishStep authFinishStep = new AuthFinishStep() {
  ...
};

// Objects implementing OtpStartStep/OtpFinishStep interfaces
OtpStartStep otpStartStep = new OtpStartStep() {
  ...
};

OtpFinishStep otpFinishStep = new OtpFinishStep() {
  ...
};

ProveAuth proveAuth = ProveAuth.builder()
    .withAuthFinishStep(authId -> verify(authId)) // verify(authId) call defined in #Validate the Mobile Phone section
    .withOtpFallback(otpStartStep, otpFinishStep)
    .withContext(this)
    .build();
Builder class offers a withTestMode(boolean testMode) method, which permits simulated successful session results while connected to a Wi-Fi network only. Testing using a Wi-Fi connection is useful in the Sandbox environment.ProveAuth proveAuth = ProveAuth.builder()
.withAuthFinishStep(authId -> verify(authId))
.withOtpFallback(otpStartStep, otpFinishStep)
.withContext(this)
.withTestMode(true) // Test mode flag
.build();
ProveAuth object is thread safe. You can use it as a singleton. Most Prove Auth methods are blocking and therefore can’t execute in the main app thread. The app employs an executor service with a minimum of two threads to manage threads due to the ability to process concurrent blocking requests.public class MyAuthenticator {
private final MyBackendClient backend = new MyBackendClient(); // Backend API client
private final AuthFinishStep authFinishStep = new AuthFinishStep() {
@Override
void execute(String authId) {
try {
AuthFinishResponse response = backend.authFinish("My App", authId);
... // Check the authentication status returned in the response
} catch (IOException e) {
String failureCause = e.getCause() != null ? e.getCause().getMessage() : "Failed to request authentication results";
// Authentication failed due to request failure
}
}
};
private ProveAuth proveAuth;
public MyAuthenticator(Context context) {
proveAuth = ProveAuth.builder()
.withAuthFinishStep(authFinishStep)
.withOtpFallback(otpStartStep, otpFinishStep)
.withContext(context)
.build();
}
public void authenticate() throws IOException, ProveAuthException {
AuthStartResponse response = backend.authStart("My Prove Auth App");
proveAuth.authenticate(response.getAuthToken());
}
}
OtpStartStep and OtpFinishStep so the SDK can send the code, collect the PIN, and optionally support resend, OTP retry, or phone-number change.Prerequisites
- After Prove sends the SMS, the customer has about two minutes to enter the OTP before the session times out.
- When building the authenticator, call
withOtpFallback(otpStart: OtpStartStep, otpFinish: OtpFinishStep) and implement both OtpStartStep and OtpFinishStep. The Prove client SDK orchestrates when each step runs—implement the interfaces, but do not duplicate that orchestration in app code (see Invalid OTP and step orchestration below).
Invalid OTP and step orchestrationWhen the customer enters an invalid OTP, the Prove client SDK detects it. Typical signs include a validation or reported error such as code 10001 with a message that the PIN doesn’t match. You may also see flow activity related to AuthFinishStep, such as ProveAuth.builder().withAuthFinishStep(…), that looks like an unexpected redirect.This behavior is expected. Do not add your own follow-up call to OtpFinishStep.execute to pass the error in otpException. The SDK invokes OtpFinishStep.execute when a retry or error UI is needed.Your app should implement the required step interfaces, but the Prove client SDK orchestrates when each step runs. Don’t duplicate that orchestration in application code.
Implement start and finish for your use case
Open the tab that matches how the phone number is collected and which OTP options you need. Default
Prompt for Phone Number
Resend
Retry OTP
Phone Number Change
Use this path when the server already has the phone number (for example from POST /v3/start or your server Start wrapper) and the client must not prompt for it again.Call OtpStartStepCallback.onSuccess(OtpStartInput) with an OtpStartInput instance that reflects “number already known”—typically an empty string or null for the phone value, as in the snippet—so the SDK knows the customer agreed to receive the SMS.import com.prove.sdk.proveauth.OtpStartInput;
import com.prove.sdk.proveauth.OtpStartStep;
import com.prove.sdk.proveauth.OtpStartStepCallback;
import com.prove.sdk.proveauth.ProveAuthException;
public class NoPromptStart implements OtpStartStep {
@Override
public void execute(boolean phoneNumberNeeded, ProveAuthException otpException,
OtpStartStepCallback callback) {
// No phone number needed, no need to ask end user for input.
callback.onSuccess(new OtpStartInput(""));
}
}
OtpStartStepCallback.onError() if something prevents sending the SMS (for example the customer cancels or leaves the flow with the back button).In the finish step, call OtpFinishStepCallback.onSuccess(OtpFinishInput) with the OTP the customer entered, wrapped in OtpFinishInput.import com.prove.sdk.proveauth.OtpFinishInput;
import com.prove.sdk.proveauth.OtpFinishStep;
import com.prove.sdk.proveauth.OtpFinishStepCallback;
import com.prove.sdk.proveauth.OtpValidationException;
import com.prove.sdk.proveauth.ProveAuthException;
public class NoPromptFinish implements OtpFinishStep {
@Override
public void execute(@Nullable ProveAuthException otpException,
OtpFinishStepCallback otpFinishStepCallback) {
// If error message is found, handle it.
if (otpException instanceof OtpValidationException) {
// Set to a variable and display it in a field.
// In this example, we don't do anything with the error.
String errorMsg = otpException.getMessage();
}
try {
// Prompt the user for OTP delivered by SMS. You can build UI to provide
// best UX based on your application and business logic, here we simplify to a
// generic function named promptForOtpCode which gives us the OTP code.
String otpCode = promptForOtpCode();
otpFinishStepCallback.onSuccess(new OtpFinishInput(otpCode));
} catch (Exception e) {
// if any issue with the OTP collection from the end user or the user wants to cancel
// then call onError to exit the flow. In this example we simplify it as catching
// an exception.
otpFinishStepCallback.onError();
}
}
}
Use this path when the Android app collects the phone number in the client and you do not need SMS resend, dedicated OTP retry handling beyond defaults, or phone-number change. For those capabilities, use Resend, Retry OTP, or Phone Number Change.In the start step, call OtpStartStepCallback.onSuccess(OtpStartInput) with the collected number.import com.prove.sdk.proveauth.OtpStartInput;
import com.prove.sdk.proveauth.OtpStartStep;
import com.prove.sdk.proveauth.OtpStartStepCallback;
import com.prove.sdk.proveauth.PhoneNumberValidationException;
import com.prove.sdk.proveauth.ProveAuthException;
public class PromptStart implements OtpStartStep {
@Override
public void execute(boolean phoneNumberNeeded, @Nullable ProveAuthException otpException,
OtpStartStepCallback callback) {
// If phone number is needed, need to ask the end user for phone number input.
if (phoneNumberNeeded) {
// If error message is found around phone number, handle it.
// The `PhoneNumberValidationException` is ONLY available when `phoneNumberNeeded`
// has a value.
if (otpException instanceof PhoneNumberValidationException) {
// Set to a variable and display it in a field.
// In this example, we don't do anything with the error.
String errorMsg = otpException.getMessage();
}
try {
// Prompt the user for phone number to receive OTP SMS. You can build UI to provide
// best UX based on your application and business logic, here we simplify to a
// generic function named promptForPhoneNumber which gives us the collected
// phone number.
String phoneNumber = promptForPhoneNumber();
callback.onSuccess(new OtpStartInput(phoneNumber));
} catch (Exception e) {
// if any issue with the phone number collection from the end user or the user
// wants to cancel then call onError to exit the flow.
// In this example we simplify it as catching an exception.
callback.onError();
}
} else {
// No phone number needed, no need to ask end user for input.
callback.onSuccess(new OtpStartInput(""));
}
}
}
import com.prove.sdk.proveauth.OtpFinishInput;
import com.prove.sdk.proveauth.OtpFinishStep;
import com.prove.sdk.proveauth.OtpFinishStepCallback;
import com.prove.sdk.proveauth.OtpValidationException;
import com.prove.sdk.proveauth.ProveAuthException;

public class NoPromptFinish implements OtpFinishStep {
    @Override
    public void execute(@Nullable ProveAuthException otpException,
            OtpFinishStepCallback otpFinishStepCallback) {
        // If error message is found, handle it.
        if (otpException instanceof OtpValidationException) {
            // Set to a variable and display it in a field.
            // In this example, we don't do anything with the error.
            String errorMsg = otpException.getMessage();
        }

        try {
            // Prompt the user for OTP delivered by SMS. You can build UI to provide
            // best UX based on your application and business logic, here we simplify to a
            // generic function named promptForOtpCode which gives us the OTP code.
            String otpCode = promptForOtpCode();
            otpFinishStepCallback.onSuccess(new OtpFinishInput(otpCode));
        } catch (Exception e) {
            // if any issue with the OTP collection from the end user or the user wants to cancel
            // then call onError to exit the flow. In this example we simplify it as catching
            // an exception.
            otpFinishStepCallback.onError();
        }
    }

}
To use the Resend/Retry/Phone Change features, install the Android SDK version 6.5.0 or later.
import com.prove.sdk.proveauth.OtpStartInput;
import com.prove.sdk.proveauth.OtpStartStep;
import com.prove.sdk.proveauth.OtpStartStepCallback;
import com.prove.sdk.proveauth.PhoneNumberValidationException;
import com.prove.sdk.proveauth.ProveAuthException;

public class PromptStart implements OtpStartStep {
    @Override
    public void execute(boolean phoneNumberNeeded, @Nullable ProveAuthException otpException,
            OtpStartStepCallback callback) {
        // If phone number is needed, need to ask the end user for phone number input.
        if (phoneNumberNeeded) {
            // If error message is found around phone number, handle it.
            // The `PhoneNumberValidationException` is ONLY available when `phoneNumberNeeded`
            // has a value.
            if (otpException instanceof PhoneNumberValidationException) {
                // Set to a variable and display it in a field.
                // In this example, we don't do anything with the error.
                String errorMsg = otpException.getMessage();
            }

            try {
                // Prompt the user for phone number to receive OTP SMS. You can build UI to provide
                // best UX based on your application and business logic, here we simplify to a
                // generic function named promptForPhoneNumber which gives us the collected
                // phone number.
                String phoneNumber = promptForPhoneNumber();
                callback.onSuccess(new OtpStartInput(phoneNumber));
            } catch (Exception e) {
                // if any issue with the phone number collection from the end user or the user
                // wants to cancel then call onError to exit the flow.
                // In this example we simplify it as catching an exception.
                callback.onError();
            }
        } else {
            // No phone number needed, no need to ask end user for input.
            callback.onSuccess(new OtpStartInput(""));
        }
    }

}
import com.prove.sdk.proveauth.OtpFinishInput;
import com.prove.sdk.proveauth.OtpFinishStep;
import com.prove.sdk.proveauth.OtpFinishStepCallback;
import com.prove.sdk.proveauth.OtpValidationException;
import com.prove.sdk.proveauth.ProveAuthException;
public class MultipleResendFinish implements OtpFinishStep {
@Override
public void execute(@Nullable ProveAuthException otpException,
OtpFinishStepCallback otpFinishStepCallback) {
// If error message is found, handle it.
if (otpException instanceof OtpValidationException) {
// Set to a variable and display it in a field.
// In this example, we don't do anything with the error.
String errorMsg = otpException.getMessage();
}
// Prompt the user for whether they received the SMS.
if (promptForResend("Didn't receive the SMS OTP? Click resend button for a new one!")) {
// If the end user wants to send again to the same phone number call onOtpResend().
otpFinishStepCallback.onOtpResend();
return;
}
try {
// Prompt the user for OTP delivered by SMS. You can build UI to provide
// best UX based on your application and business logic, here we simplify to a
// generic function named promptForOtpCode which gives us the OTP code.
String otpCode = promptForOtpCode();
otpFinishStepCallback.onSuccess(new OtpFinishInput(otpCode));
} catch (Exception e) {
// if any issue with the OTP collection from the end user or the user wants to cancel
// then call onError to exit the flow. In this example we simplify it as catching
// an exception.
otpFinishStepCallback.onError();
}
}
}
To use the Resend/Retry/Phone Change features, install the Android SDK version 6.5.0 or later.
allowOTPRetry=true on POST /v3/start (or your equivalent Start request).Implement the start step—no extra client changes beyond your normal prompt path:import com.prove.sdk.proveauth.OtpStartInput;
import com.prove.sdk.proveauth.OtpStartStep;
import com.prove.sdk.proveauth.OtpStartStepCallback;
import com.prove.sdk.proveauth.PhoneNumberValidationException;
import com.prove.sdk.proveauth.ProveAuthException;
public class PromptStart implements OtpStartStep {
@Override
public void execute(boolean phoneNumberNeeded, @Nullable ProveAuthException otpException,
OtpStartStepCallback callback) {
// If phone number is needed, need to ask the end user for phone number input.
if (phoneNumberNeeded) {
// If error message is found around phone number, handle it.
// The `PhoneNumberValidationException` is ONLY available when `phoneNumberNeeded`
// has a value.
if (otpException instanceof PhoneNumberValidationException) {
// Set to a variable and display it in a field.
// In this example, we don't do anything with the error.
String errorMsg = otpException.getMessage();
}
try {
// Prompt the user for phone number to receive OTP SMS. You can build UI to provide
// best UX based on your application and business logic, here we simplify to a
// generic function named promptForPhoneNumber which gives us the collected
// phone number.
String phoneNumber = promptForPhoneNumber();
callback.onSuccess(new OtpStartInput(phoneNumber));
} catch (Exception e) {
// if any issue with the phone number collection from the end user or the user
// wants to cancel then call onError to exit the flow.
// In this example we simplify it as catching an exception.
callback.onError();
}
} else {
// No phone number needed, no need to ask end user for input.
callback.onSuccess(new OtpStartInput(""));
}
}
}
AuthFinish runs.import com.prove.sdk.proveauth.OtpFinishInput;
import com.prove.sdk.proveauth.OtpFinishStep;
import com.prove.sdk.proveauth.OtpFinishStepCallback;
import com.prove.sdk.proveauth.OtpValidationException;
import com.prove.sdk.proveauth.ProveAuthException;
public class NoPromptFinish implements OtpFinishStep {
@Override
public void execute(@Nullable ProveAuthException otpException,
OtpFinishStepCallback otpFinishStepCallback) {
// If error message is found, handle it.
if (otpException instanceof OtpValidationException) {
// Set to a variable and display it in a field.
// In this example, we don't do anything with the error.
String errorMsg = otpException.getMessage();
}
try {
// Prompt the user for OTP delivered by SMS. You can build UI to provide
// best UX based on your application and business logic, here we simplify to a
// generic function named promptForOtpCode which gives us the OTP code.
String otpCode = promptForOtpCode();
otpFinishStepCallback.onSuccess(new OtpFinishInput(otpCode));
} catch (Exception e) {
// if any issue with the OTP collection from the end user or the user wants to cancel
// then call onError to exit the flow. In this example we simplify it as catching
// an exception.
otpFinishStepCallback.onError();
}
}
}
To use the Resend/Retry/Phone Change features, install the Android SDK version 6.5.0 or later.
Manual Request RequiredTo enable phone number change capabilities on your credentials, contact your Prove representative.
import com.prove.sdk.proveauth.OtpStartInput;
import com.prove.sdk.proveauth.OtpStartStep;
import com.prove.sdk.proveauth.OtpStartStepCallback;
import com.prove.sdk.proveauth.PhoneNumberValidationException;
import com.prove.sdk.proveauth.ProveAuthException;

public class PromptStart implements OtpStartStep {
    @Override
    public void execute(boolean phoneNumberNeeded, @Nullable ProveAuthException otpException,
            OtpStartStepCallback callback) {
        // If phone number is needed, need to ask the end user for phone number input.
        if (phoneNumberNeeded) {
            // If error message is found around phone number, handle it.
            // The `PhoneNumberValidationException` is ONLY available when `phoneNumberNeeded`
            // has a value.
            if (otpException instanceof PhoneNumberValidationException) {
                // Set to a variable and display it in a field.
                // In this example, we don't do anything with the error.
                String errorMsg = otpException.getMessage();
            }

            try {
                // Prompt the user for phone number to receive OTP SMS. You can build UI to provide
                // best UX based on your application and business logic, here we simplify to a
                // generic function named promptForPhoneNumber which gives us the collected
                // phone number.
                String phoneNumber = promptForPhoneNumber();
                callback.onSuccess(new OtpStartInput(phoneNumber));
            } catch (Exception e) {
                // if any issue with the phone number collection from the end user or the user
                // wants to cancel then call onError to exit the flow.
                // In this example we simplify it as catching an exception.
                callback.onError();
            }
        } else {
            // No phone number needed, no need to ask end user for input.
            callback.onSuccess(new OtpStartInput(""));
        }
    }

}
import com.prove.sdk.proveauth.OtpFinishInput;
import com.prove.sdk.proveauth.OtpFinishStep;
import com.prove.sdk.proveauth.OtpFinishStepCallback;
import com.prove.sdk.proveauth.OtpValidationException;
import com.prove.sdk.proveauth.ProveAuthException;

public class PhoneChangeFinish implements OtpFinishStep {
    @Override
    public void execute(@Nullable ProveAuthException otpException,
            OtpFinishStepCallback otpFinishStepCallback) {
        // If error message is found, handle it.
        if (otpException instanceof OtpValidationException) {
            // Set to a variable and display it in a field.
            // In this example, we don't do anything with the error.
            String errorMsg = otpException.getMessage();
        }

        // Prompt the user for whether they received the SMS.
        if (promptForPhoneNumberChange("Didn't receive the SMS OTP? Try a different phone number.")) {
            // If the end user wants to correct the phone number already in use, or changing to a
            // different phone number to receive the future SMS OTP, call onMobileNumberChange(), and
            // the otpStartStep will re-prompt for phone number input from the end user.
            otpFinishStepCallback.onMobileNumberChange();
            return;
        }

        try {
            // Prompt the user for OTP delivered by SMS. You can build UI to provide
            // best UX based on your application and business logic, here we simplify to a
            // generic function named promptForOtpCode which gives us the OTP code.
            String otpCode = promptForOtpCode();
            otpFinishStepCallback.onSuccess(new OtpFinishInput(otpCode));
        } catch (Exception e) {
            // if any issue with the OTP collection from the end user or the user wants to cancel
            // then call onError to exit the flow. In this example we simplify it as catching
            // an exception.
            otpFinishStepCallback.onError();
        }
    }

}
Verify the integration
In Sandbox, walk each shipped path (default, prompt, resend, retry if enabled, phone change if enabled). Confirm SMS delivery, OTP entry within the timeout, and that you never manually chain OtpFinishStep.execute on top of the SDK’s invalid-OTP handling—the SDK should remain the single orchestrator for retries and errors.
Instant Link for Android is an add-on feature. To enable, contact your Prove representative.
Prerequisites
- Instant Link is enabled for your project (contact your Prove representative if needed).
- Verified App Links (recommended) so the SMS redirect opens your app with the full URL string. See App Links in the Android documentation.
When building the authenticator, use withInstantLinkFallback(InstantLinkStartStep startStep, @Nullable InstantLinkRetryStep retryStep). Implement InstantLinkStartStep in every flow. Add InstantLinkRetryStep only if you support Resend or Phone Number Change (see those tabs). When you have a mobile number, pass it in InstantLinkStartInput (for example the mobileNumber field) to callback.onSuccess(...).Implement the Instant Link start step
Open the tab that matches how the phone number is collected and sent to Prove. Default
Prompt for Phone Number
Resend
Phone Number Change
Use this path when the server already has the phone number (for example from your initial Start call) and the client must not prompt again.Call callback.onSuccess(InstantLinkStartInput input) so the SDK knows the customer agreed to receive the SMS.InstantLinkStartStep noPromptStartStep = (phoneNumberNeeded, instantLinkError, callback) -> {
// No phone number needed, no need to ask end user for input.
if (!phoneNumberNeeded) {
callback.onSuccess(new InstantLinkStartInput(""));
}
};
Use this path when the client collects the number and you do not need resend or phone-number change.Call callback.onSuccess(InstantLinkStartInput input) with the collected number. Call callback.onError() if collection fails, the customer cancels, or they leave the Instant Link start UI (for example with the back button).InstantLinkStartStep promptStartStep = (phoneNumberNeeded, instantLinkError, callback) -> {
// No phone number needed, no need to ask end user for input.
if (phoneNumberNeeded) {
// If error message is found around phone number, handle it.
// The `PhoneNumberValidationException` is ONLY available when `phoneNumberNeeded`
// has a value.
if (instantLinkError instanceof PhoneNumberValidationException) {
// Set to a variable and display it in a field.
// In this example, we don't do anything with the error.
String errorMsg = instantLinkError.getMessage();
}
try {
// Prompt the user for phone number to receive InstantLink SMS.
// You can build UI to provide best UX based on your application and business logic,
// here we simplify to a generic function named promptForPhoneNumber which gives us
// the collected phone number.
String phoneNumber = promptForPhoneNumber();
callback.onSuccess(new InstantLinkStartInput(phoneNumber));
} catch (Exception e) {
// if any issue with the phone number collection from the end user or the user
// wants to cancel then call onError to exit the flow.
// In this example we simplify it as catching an exception.
callback.onError();
}
} else {
// No phone number needed, no need to ask end user for input.
callback.onSuccess(new InstantLinkStartInput(""));
}
};
To use the Resend/Phone Number Change features, install the Android SDK version 6.10.3 or later.
InstantLinkStartStep promptStartStep = (phoneNumberNeeded, instantLinkError, callback) -> {
    // No phone number needed, no need to ask end user for input.
    if (phoneNumberNeeded) {
        // If error message is found around phone number, handle it.
        // The `PhoneNumberValidationException` is ONLY available when `phoneNumberNeeded`
        // has a value.
        if (instantLinkError instanceof PhoneNumberValidationException) {
            // Set to a variable and display it in a field.
            // In this example, we don't do anything with the error.
            String errorMsg = instantLinkError.getMessage();
        }

        try {
            // Prompt the user for phone number to receive InstantLink SMS.
            // You can build UI to provide best UX based on your application and business logic,
            // here we simplify to a generic function named promptForPhoneNumber which gives us
            // the collected phone number.
            String phoneNumber = promptForPhoneNumber();
            callback.onSuccess(new InstantLinkStartInput(phoneNumber));
        } catch (Exception e) {
            // if any issue with the phone number collection from the end user or the user
            // wants to cancel then call onError to exit the flow.
            // In this example we simplify it as catching an exception.
            callback.onError();
        }
    } else {
        // No phone number needed, no need to ask end user for input.
        callback.onSuccess(new InstantLinkStartInput(""));
    }
};
InstantLinkRetryStep so the customer can request another SMS, for example:InstantLinkRetryStep promptMultiResendRetryStep = callback -> {
// Prompt the user for whether they received the SMS.
if (promptForResend(
"Didn't receive the InstantLink SMS? Click resend button for a new one!")) {
// If the end user wants to send again to the same phone number call onResend().
callback.onResend();
}
};
To use the Resend/Phone Number Change features, install the Android SDK version 6.10.3 or later.
Manual Request RequiredTo enable phone number change capabilities on your credentials, contact your Prove representative.
InstantLinkStartStep promptStartStep = (phoneNumberNeeded, instantLinkError, callback) -> {
    // No phone number needed, no need to ask end user for input.
    if (phoneNumberNeeded) {
        // If error message is found around phone number, handle it.
        // The `PhoneNumberValidationException` is ONLY available when `phoneNumberNeeded`
        // has a value.
        if (instantLinkError instanceof PhoneNumberValidationException) {
            // Set to a variable and display it in a field.
            // In this example, we don't do anything with the error.
            String errorMsg = instantLinkError.getMessage();
        }

        try {
            // Prompt the user for phone number to receive InstantLink SMS.
            // You can build UI to provide best UX based on your application and business logic,
            // here we simplify to a generic function named promptForPhoneNumber which gives us
            // the collected phone number.
            String phoneNumber = promptForPhoneNumber();
            callback.onSuccess(new InstantLinkStartInput(phoneNumber));
        } catch (Exception e) {
            // if any issue with the phone number collection from the end user or the user
            // wants to cancel then call onError to exit the flow.
            // In this example we simplify it as catching an exception.
            callback.onError();
        }
    } else {
        // No phone number needed, no need to ask end user for input.
        callback.onSuccess(new InstantLinkStartInput(""));
    }
};
InstantLinkRetryStep to collect a new number, for example:InstantLinkRetryStep promptPhoneNumChangeRetryStep = callback -> {
// Prompt the user for whether they received the SMS.
if (promptForChangePhoneNumber(
"Didn't receive the InstantLink SMS? Try a different phone number.")) {
// If the end user wants to send again to the same phone number call onResend().
callback.onResend();
}
};
Handle the redirect and resume the session
After the user finishes the web step outside your app, Prove redirects to the finalTargetUrl from your server Start call. Your App Link (or equivalent) must deliver that URL into your app so you can pass the full string—including query parameters—into finishInstantLink(String redirectUrl).Call finishInstantLink from the code path that handles the incoming deep link (for example onCreate() in your App Link activity).Register an activity similar to this (replace the host with yours):<activity android:name=".MyAppLinkHandlerActivity"
android:exported="true"
android:launchMode="singleTask"
android:excludeFromRecents="true"
android:taskAffinity="">
<intent-filter android:autoVerify="true">
<action android:name="android.intent.action.VIEW" />
<category android:name="android.intent.category.DEFAULT" />
<category android:name="android.intent.category.BROWSABLE" />
<data android:scheme="https" android:host="my.applink.com" />
</intent-filter>
</activity>
finalTargetUrl plus parameters the SDK needs. Example: if Start used https://yourDeepLinkUrl.com, the link might look like https://yourDeepLinkUrl.com?asc=true&authId=some-uuid-string.| Parameter | Meaning |
|---|
asc | "true" or "false": whether the server considers the auth session complete. |
authId | UUID for the session; the SDK uses it to match the redirect to the in-progress client session. |
ProveAuthException and does not continue the flow.Verify: In Sandbox, complete a flow where the SMS opens your handler activity; finishInstantLink should run with the full URL and the session should resume without ProveAuthException from a well-formed redirect. Verify Mobile Number
In the AuthFinishStep, specify a function to call once the possession checks complete on the mobile phone. This endpoint on your back end server calls the UnifyStatus() function to validate the phone number. The AuthFinishStep then completes.rspUnifyStatus, err := client.V3.V3UnifyStatusRequest(context.TODO(), &components.V3UnifyStatusRequest{
CorrelationID: rspUnify.V3UnifyResponse.CorrelationID,
})
if err != nil {
return fmt.Errorf("error on UnifyStatus(): %w", err)
}
POST /v3/unify-status for the full response schema. Interpret evaluation using the Global Fraud Policy.If you’re using
Content Security Policy headers, ensure you allow
connect-src for
wss://*.prove-auth.proveapis.com,
wss://device.uat.proveapis.com, and
wss://device.proveapis.com as required for your environment.
Prove Key validity: Prove deactivates the key on our servers after an extended period of inactivity (each successful authentication resets that period). On iOS, the Prove Key remains on the device after uninstall and reinstall. Key Persistence is available for the Web SDK only—not the native Android SDK. Pass rebind on /v3/unify to force a full possession check when needed. See Prove Key validity and expiration. If you send a different phone number to /unify than the one registered to the Prove key, success=false returns when calling /unify-status. This is because the Prove Key is bound to a different number. Run the flow again with rebind=true in the /unify endpoint. This forces a full possession check and then, if valid, rebinds the Prove Key to the new phone number.
Sandbox Testing
Prerequisites
Test users list
Short-term test users
Use this test user when performing initial testing with cURL or Postman. This test user skips the client-side SDK authentication to walk you through the sequence of API calls.
North America
International
| Phone Number | First Name | Last Name |
|---|
| 2001004018 | Barbaraanne | Canet |
| Phone Number | First Name | Last Name |
|---|
| +2001004029 | Janos | Martina |
Unified Auth test users
Follow the Testing Steps for expected behavior per step. These users allow you to test “Prove Possession” and “Customer-Supplied Possession with Force Bind” flows.
North America
International
| Phone Number | First Name | Last Name |
|---|
| 2001004014 | Lorant | Nerger |
| 2001004015 | Laney | Dyball |
| Phone Number | First Name | Last Name |
|---|
| +2001004025 | Bertie | Fremont |
| +2001004026 | Bonnie | Sidon |
Mobile Auth test users
Follow the Testing Steps for expected behavior per step. These users allow you to test “Prove Possession” and “Prove Passive Authentication with Customer-Supplied Possession Fallback” flows.
North America
International
| Phone Number | First Name | Last Name |
|---|
| 2001004016 | Inge | Galier |
| 2001004017 | Jesse | Mashro |
| 2001004041 | Penny | Jowers |
| Phone Number | First Name | Last Name |
|---|
| +2001004027 | Allissa | Zoren |
| +2001004028 | Wendy | Strover |
| +2001004043 | Amii | Porritt |
Testing steps
Now that you’ve done client-side, server-side, and CX implementation, test using the test users.
Lorant
Laney
Inge
Penny
Bertie
Bonnie
Allissa
Wendy
Amii
Fail
Follow these steps to test the Prove Unified Authentication flow with Lorant Nerger on mobile. This user passes Prove’s possession and return success=true in the /unify-status response.Prompt Customer
Start the onboarding flow on the initial screen and enter the phone number for Lorant Nerger.
Initiate Start Request
Your front end sends the phone number and possession type to the back end. Your back end sends the phone number to the /unify endpoint. The response provides an auth token, correlation ID, and success=pending.
Send Auth Token to the Front End
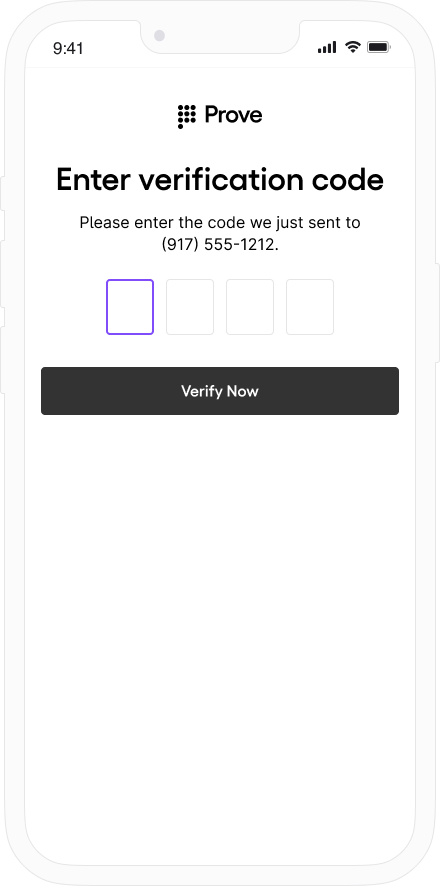
Your back end sends the authToken to the front end. The front end runs OTP handling. Enter 1234 to simulate a successful OTP. Verify Mobile Number
Once the front end finishes the possession check, the back end calls POST /v3/unify-status with the correlation ID to validate the phone number.
Expect success=true, proveId, deviceId, and phoneNumber in Sandbox. See POST /v3/unify-status for the full response.You have a successful flow and a Prove key for this phone number. Sending this user through again bypasses the possession check due to the Prove key. Send the user on through your authenticated flow. Follow these steps to test the Prove Unified Authentication flow with Laney Dyball on mobile. This user fails Prove’s possession and return success=false in the /unify-status response.Prompt Customer
Start the onboarding flow on the initial screen and enter the phone number for Laney Dyball.
Initiate Start Request
Your front end sends the phone number and possession type to the back end. Your back end sends the phone number to the /unify endpoint. The response provides an auth token, correlation ID, and success=pending.
Send Auth Token to the Front End
Your back end sends the authToken to the front end. The front end runs OTP handling. Enter 1111 to simulate an unsuccessful OTP. Verify Mobile Number
Once the front end finishes the possession check, the back end calls POST /v3/unify-status with the correlation ID to validate the phone number.
Expect success=false and phoneNumber. See POST /v3/unify-status.The test user failed. Send the user through your exception process. Use this procedure to test the Prove passive authentication with customer-supplied possession fallback flow with Inge Galier on mobile. This user passes Mobile Auth and returns success=true in the /unify-status response.Prompt Customer
Start the onboarding flow on the initial screen and enter the phone number for Inge Galier.
Initiate Start Request
Your front end sends the possession type to the back end. Your back end calls the /unify endpoint. The response provides an auth token, correlation ID, and success=pending.
Send Auth Token to the Front End
Your back end sends the authToken to the front end. The front end runs Mobile Auth.
Verify Mobile Number
Once the front end finishes the possession check, the back end calls POST /v3/unify-status with the correlation ID to validate the phone number.
Expect success=true, proveId, deviceId, and phoneNumber from Mobile Auth in Sandbox. See POST /v3/unify-status for the full response.You have a successful flow and a Prove key tied to this phone number. Sending this user through again bypasses the possession check due to the Prove key. Send the user on through your authenticated flow. If you are testing the reputation check flow by sending checkReputation=true in the /unify request, Penny fails the reputation check and returns success=false in the final response.
success=true in the /unify-status response.Prompt Customer
Start the onboarding flow on the initial screen and enter the phone number for Penny Jowers.
Initiate Start Request
Your front end sends the phone number and possession type to the back end. Your back end sends the phone number to the /unify endpoint. The response provides an auth token, correlation ID, and success=pending.
Send Auth Token to the Front End
Your back end sends the authToken to the front end. The front end attempts Mobile Auth, which fails. The SDK then falls back to OTP handling. Enter 1234 to simulate a successful OTP. Verify Mobile Number
Once the front end finishes the possession check, the back end calls POST /v3/unify-status with the correlation ID to validate the phone number.
Expect success=true, proveId, deviceId, and phoneNumber in Sandbox. See POST /v3/unify-status for the full response.You have a successful flow and a Prove key tied to this phone number. Sending this user through again bypasses the possession check due to the Prove key. Send the user on through your authenticated flow. Follow these steps to test the Prove Unified Authentication flow with Bertie Fremont on mobile. This user passes Prove’s possession and return success=true in the /unify-status response.Prompt Customer
Start the onboarding flow on the initial screen and enter the phone number for Bertie Fremont.
Initiate Start Request
Your front end sends the phone number and possession type to the back end. Your back end sends the phone number to the /unify endpoint. The response provides an auth token, correlation ID, and success=pending.
Send Auth Token to the Front End
Your back end sends the authToken to the front end. The front end runs OTP handling. Enter 1234 to simulate a successful OTP. Verify Mobile Number
Once the front end finishes the possession check, the back end calls POST /v3/unify-status with the correlation ID to validate the phone number.
Expect success=true, proveId, deviceId, and phoneNumber in Sandbox. See POST /v3/unify-status for the full response.You have a successful flow and a Prove key tied to this phone number. Send the user on through your authenticated flow. Follow these steps to test the Prove Unified Authentication flow with Bonnie Sidon on mobile. This user fails Prove’s possession and return success=false in the /unify-status response.Prompt Customer
Start the onboarding flow on the initial screen and enter the phone number for Bonnie Sidon.
Initiate Start Request
Your front end sends the phone number and possession type to the back end. Your back end sends the phone number to the /unify endpoint. The response provides an auth token, correlation ID, and success=pending.
Send Auth Token to the Front End
Your back end sends the authToken to the front end. The front end runs OTP handling. Enter 1111 to simulate an unsuccessful OTP. Verify Mobile Number
Once the front end finishes the possession check, the back end calls POST /v3/unify-status with the correlation ID to validate the phone number.
Expect success=false and phoneNumber. See POST /v3/unify-status.The test user failed. Send the user through your exception process. Follow these steps to test the Prove Unified Authentication flow with Allissa Zoren on mobile. This user passes Mobile Auth and returns success=true in the /unify-status response.Prompt Customer
Start the onboarding flow on the initial screen and enter the phone number for Allissa Zoren.
Initiate Start Request
Your front end sends the possession type to the back end. Your back end calls the /unify endpoint. The response provides an auth token, correlation ID, and success=pending.
Send Auth Token to the Front End
Your back end sends the authToken to the front end. The front end runs Mobile Auth.
Verify Mobile Number
Once the front end finishes the possession check, the back end calls POST /v3/unify-status with the correlation ID to validate the phone number.
Expect success=true, proveId, deviceId, and phoneNumber from Mobile Auth in Sandbox. See POST /v3/unify-status for the full response.You have a successful flow and a Prove key tied to this phone number. Sending this user through again bypasses the possession check due to the Prove key. Send the user on through your authenticated flow. Follow these steps to test the Prove Unified Authentication flow with Wendy Strover on mobile. This user fails Mobile Auth and return success=false in the /unify-status response.Prompt Customer
Start the onboarding flow on the initial screen and enter the phone number for Wendy Strover.
Initiate Start Request
Your front end sends the phone number and possession type to the back end. Your back end sends the phone number to the /unify endpoint. The response provides an auth token, correlation ID, and success=pending.
Send Auth Token to the Front End
Your back end sends the authToken to the front end. The front end fails Mobile Auth.
If you are testing the reputation check flow by sending checkReputation=true in the /unify request, Amii fails the reputation check and returns success=false in the final response.
success=true in the /unify-status response.Prompt Customer
Start the onboarding flow on the initial screen and enter the phone number for Amii Porritt.
Initiate Start Request
Your front end sends the phone number and possession type to the back end. Your back end sends the phone number to the /unify endpoint. The response provides an auth token, correlation ID, and success=pending.
Send Auth Token to the Front End
Your back end sends the authToken to the front end. The front end attempts Mobile Auth, which fails. The SDK falls back to OTP handling. Enter 1234 to simulate a successful OTP. Verify Mobile Number
Once the front end finishes the possession check, the back end calls POST /v3/unify-status with the correlation ID to validate the phone number.
Expect success=true, proveId, deviceId, and phoneNumber in Sandbox. See POST /v3/unify-status for the full response.You have a successful flow and a Prove key tied to this phone number. Sending this user through again bypasses the possession check due to the Prove key. Send the user on through your authenticated flow. Follow these steps to test the Prove Unified Authentication flow with Lorant, Jesse, Bertie, or Wendy. This introduces failures into the flow and return success=false at various points.Send Auth Token to the Front End
During the mobile flow, use 1111 to simulate a failed OTP.Once the front end finishes the possession check, the back end calls the /unify-status endpoint with the correlation ID to validate the phone number.The user then fails /unify-status.{
"phoneNumber": "2001004017",
"success": "false"
}